Sometimes when we are creating a project using a linear actuator, we are trying to solve a problem that could not be solved without the advantages that these mechanisms offer. Other times, we are trying to make a certain task easier by automating it. But every now and then, we will create something just because we can. This is one of those projects.
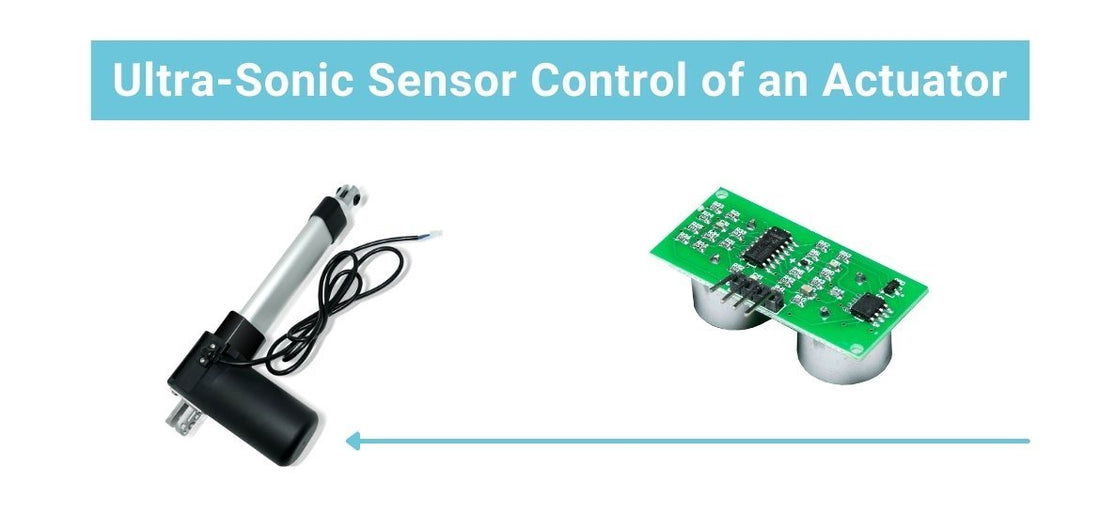
In this article, we will go over how you can use an ultrasonic sensor to measure the linear actuator distance of an object and use it to automatically change the position of the actuator’s stroke. While this was not created with any specific application in mind, the possibilities are endless.
Here is What You Will Need
- 1 x RobotPower MegaMoto Motor Driver Shield
- 1 x Arduino Uno
- 1 x Ultra-Sonic Sensor
- 1 x PA-04-12-400-HS-24VDC (can be any actuator with a hall effect feedback)
- 1 x PS-20-24 (or any 24VDC power supply rated for at least 6amps)
For control, we are using and Arduino Uno with a MegaMoto motor driver. Our actuator is the PA-04-12-400-HS-24VDC. It is important that the actuator has some kind of feedback so that the Arduino is able to monitor its position – any linear actuator feedback control can work, for instance potentiometer feedback would also be effective here. The potentiometer would be less accurate, but would have the advantage of not requiring a homing procedure to be performed after a power loss. The code would also need to be modified.
Step 1: Wiring

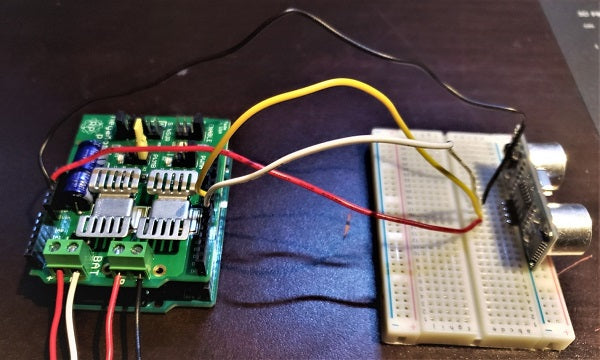
The wiring for this project is very simple. We will only be making use of one of the two hall effect sensors in the PA-04-HS here – it does not matter which one (pin 4 or 5). The pinout below is for the 6-pin Molex connector that comes with the PA-04-HS:

Actuator’s 6-pin connector to Arduino/MegaMoto
- Pin 3 to 5V
- Pin 2 to GND
- Pin 1 to Arduino pin 2
- Pin 4 to A on the MegaMoto
- Pin 5 to B on the MegaMoto
Ultra-sonic senor to Arduino/Megamoto
- VCC to 5V
- GND to GND
- Trig to Pin 8
- Echo to Pin 7
MegaMoto to Power Supply
- + to V+
- - to V-
Step 2: Programming the Arduino
The code used in the tutorial is a modified version of what we used in another post, Hall Effect Sensors 1: Position Control. Feel free to take a look at this tutorial to better understand how we are using the hall effect sensor for position control! How the ultra-sonic sensor works is by transmitting an ultrasonic ping that is triggered by one of the GPIO pins on the Arduino. That ultrasonic ping is then reflected off an object and detected by the receiver. When the receiver detects the ping, it sends a pulse to the Arduino. Through this, we can conduct an equation to calculate the distance for a linear actuator by measuring the amount of time between transmission and reception, and use a formula to convert that measurement into inches.
How we determine the position of the actuator is by counting the number of pulses output by the Hall effect sensor (this is described in greater detail in the post mentioned above). We can determine the stroke position in inches by finding out how many pulses/inch is output by our specific actuator, and then dividing our pulse count by that number. Having the reading from the ultrasonic sensor and the reading from the Hall effect sensor both converted to inches, makes the coding much cleaner and easier. From there, we are essentially telling the Arduino “if the object is x inches away, extend the actuator x inches.” Uploading the code below will allow you to put in place the linear actuator controlled distance model to one of our PA-04-12-400-HS-24VDC actuators. In the next step we will go over modifications that can be made to the code.
[code]
/* The purpose of this code it to be able to measure the distance of an object and position the stroke of a linear acuator accordingly.
 *  The required components are an Arduion Uno, a PobotPower MegaMoto Driver, and an Ultra sonic sensor.
 *  Written by Progressive Automations 2/02/21
 */

#define PWMA0 6
#define PWMB0 5
#define enable0 13   //pins for MegaMoto

#define hall0 2 //interrupt pins for hall effect sensors

#define echoPin 7 //echo pin on ultra sonic sensor
#define trigPin 8 //output on ultra sonic sensor

float duration, distance;

int enable = 0; //enable pin for megaMoto

int count[] = {0};
int currentPos = 0;//current position
int threshold = 100;//position tolerance
int destination = 0;

bool forwards = false;
bool backwards = false;// motor states

void setup() {
  pinMode(PWMA0, OUTPUT);
  pinMode(PWMB0, OUTPUT);//set PWM outputs

  pinMode(enable0, OUTPUT);
  digitalWrite(enable0, LOW);//set enable and turn board OFF

  pinMode(hall0, INPUT);
  digitalWrite(hall0, LOW);//set hall, set low to start for rising edge

  attachInterrupt(0, speed0, RISING); //enable the hall effect interupts

  pinMode(trigPin,OUTPUT);
  pinMode(echoPin, INPUT);

  Serial.begin(9600);
  //homeActuator();//fully retracts actuator
  Serial.println("READY");
}//end setup

void loop() {
getDistance();//measure distance of object from ultra sonic sensor
currentPos = count[0];
if(distance < 13) //ignore value if greater than stroke length
{
destination = distance * 275; //translate measured distance (in inches) to desired stroke position (in pulses)
}
  if ((destination >= (currentPos - threshold)) && (destination <= (currentPos + threshold))) stopMoving();//stop acuator if it is in the desired position
  else if (destination > currentPos) goForwards();
  else if (destination < currentPos) goBackwards();

  Serial.print("Counts:      "); Serial.println(count[0]);
  Serial.print("currentPos:  "); Serial.println(currentPos);
  Serial.print("Destination: "); Serial.println(destination);

}//end loop

void speed0() {
  //Serial.println("Update 1");
  if (forwards == true) count[0]++; //if moving forwards, add counts
  else if (backwards == true) count[0]--; //if moving back, subtract counts
}//end speed0

/*void ReadInputs() {

  sw[0] = digitalRead(switch0), sw[1] = digitalRead(switch1);//check switches
  currentPos = count[0];
}//end read inputs
*/
void goForwards()
{
  forwards = true;
  backwards = false;
  //Serial.println("Moving forwards");
  digitalWrite(enable0, HIGH);//enable board
  //Serial.print(" Speeds "), Serial.print(spd[0]), Serial.print(", "), Serial.print(spd[1]);
  //Serial.print(" Counts "), Serial.println(count[0]);
  analogWrite(PWMA0, 255);
  analogWrite(PWMB0, 0);//apply speeds
}//end goForwards

void goBackwards()
{
  forwards = false;
  backwards = true;
  //Serial.println("Moving backwards");
  digitalWrite(enable0, HIGH);//enable board
  //Serial.print(" Speeds "), Serial.print(spd[0]), Serial.print(", "), Serial.print(spd[1]);
  //Serial.print(" Counts "), Serial.println(count[0]);
  analogWrite(PWMA0, 0);
  analogWrite(PWMB0, 255);//apply speeds
}//end goBackwards

void stopMoving()
{
  forwards = false;
  backwards = false;
  Serial.println("Stopped");
  analogWrite(PWMA0, 0);
  analogWrite(PWMB0, 0);//set speeds to 0
  delay(10);


  digitalWrite(enable0, LOW);//disable board
}//end stopMoving

void getDistance()
{
digitalWrite(trigPin, LOW);
delayMicroseconds(10);
digitalWrite(trigPin, HIGH);
delayMicroseconds(10);
digitalWrite(trigPin, LOW);

duration = pulseIn(echoPin, HIGH);

distance = duration/58.2/2.5;
Serial.print("Distance:"); Serial.println(distance);
}

void homeActuator() //fully retract actuator and set count to 0
{
  goBackwards();
  delay(25000);//change this value to the amount of time it takes for the actuator to fully retract
  count[0] = {0};
}
[/code]
Step 3: Modifying the Code
The value of threshold determines how accurately the actuator’s position should match the reading of the ultrasonic sensor. Increasing it will decrease the accuracy, decreasing it will have the inverse effect. By having this value set to 100, we are essentially tell the Arduino not to move the actuator as long as the pulses of the hall effect and ultrasonic sensors are within 100 pulses of eachother. Have this number too low, may result in the actuator moving in frequent jerky motions as it tries to get into the exact correct position.

Change this value to the stroke length of your actuator (or an inch longer). This will tell the Arduino to ignore any values that are too high.

Change this value to the pulses/inch of your actuator.

Conclusion
We sincerely hope you find this project useful – or at least interesting! Please feel free to modify this and make it your own. As always, we would love to see any related projects that you have, whether you use this idea or create something different with our products! You also can reach us by email at sales@progressiveautomations.com and by phone at 1-800-676-6123.


